
Photo by Oleg Magni from Pexels
At my last Manufacturing at eSeven in Stavanger, I promised to demonstrate the integration between the manufacturing module and advanced warehousing. I didn’t get to demonstrate it in Stavanger because we ran out of time.
So, I thought, what better way to spend a Sunday afternoon still nursing the remainder of a flu and getting ready to catch the 18:10 to Stockholm.
Firstly, let’s start with the easy one:
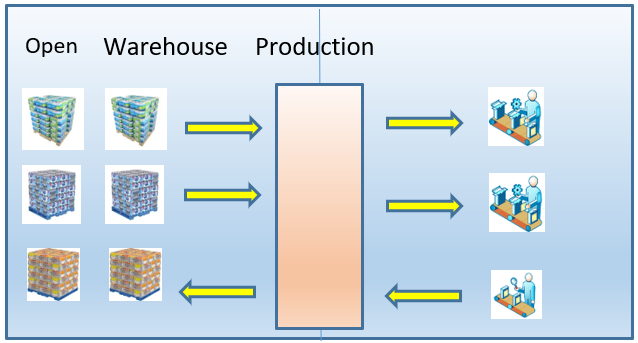
- Production is in the same location as the warehouse
- There are only one set of bins for flushing
- All flushing is set to Manual
If the location is WHITE, the location setup could look like this:
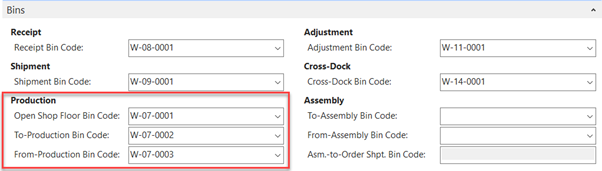
Open Shop Floor Bin Code: There seems to be a lot of confusion about this, so I resorted to check the code. If the Flushing method is set to Backward or Forward, the items must be in the Open Shop Floor Bin Code bin. Any produced sub-assemblies will end here and will be Flushed from here.
To-Production Bin Code: If the Flushing method is set to Manual, Pick+Backward or Pick+Forward, the items must be in the To-Production Bin Code bin.
From-Production Bin Code: Regardless of the Flushing method, the produced items will end in the From-Production Bin Code bin.
Let’s test that theory.
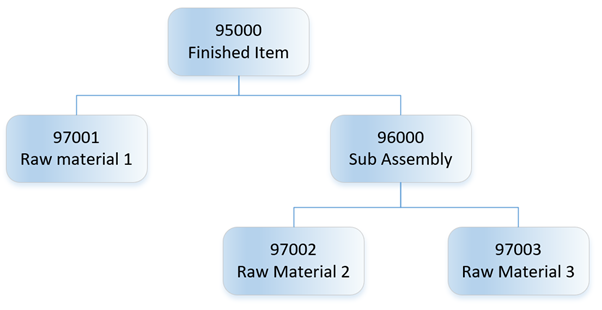
I create a new set of items with a structure like this:
I purchase the items and receive them on Inventory in location WHITE. Then I put them away at any a random bin.

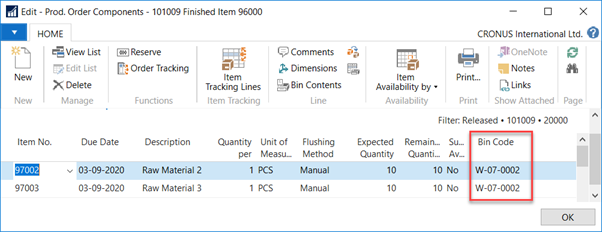
So, now we are ready for production. Creating the production order, the Prod. Order Comp and Routing report look like this:
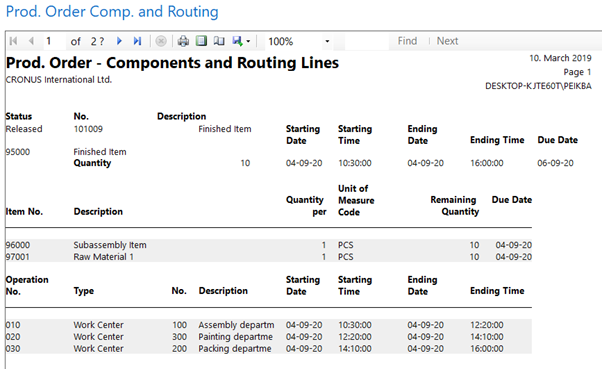
Looking at the components on the production order, the bin code is preset to be W-07-0002, which comes from the location To-Production Bin Code field.
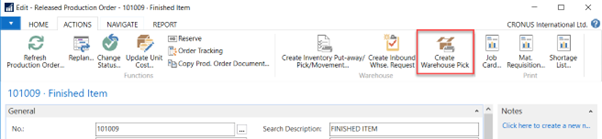
Then to create the pick, click the Create Warehouse Pick on the production order:
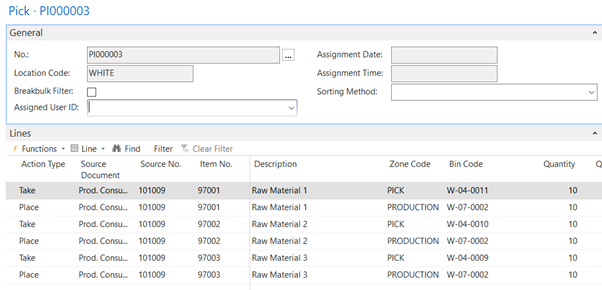
This gives me the following pick:
Posting the pick, we are ready to produce the items:
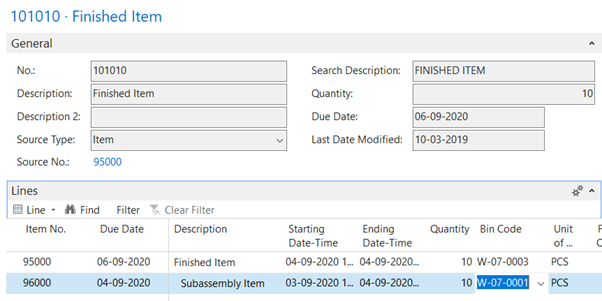
First the Subassembly, and then the Finished item:
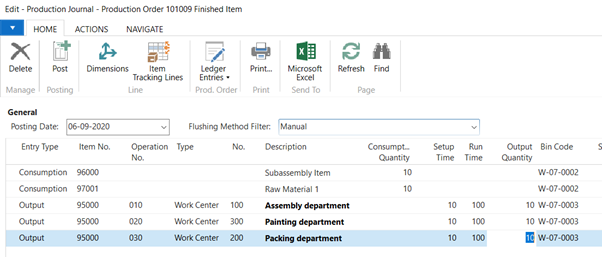
Notice the bin code on the produced item is W07-0003, which comes from the location From-Production Bin Code field.
Having produced the item, it is necessary to create an Internal Put-away:
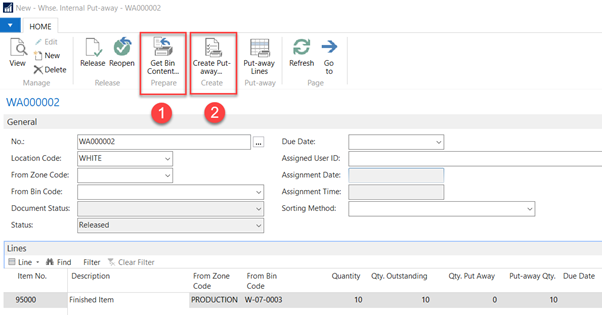
Prepare it by clicking the Get Bin Content for the Production Zone and effectuate it by clicking the Create Put-Away action.
This is an action that I usually manage automatically when posting the output.
Now we get a Put-Away document to post:
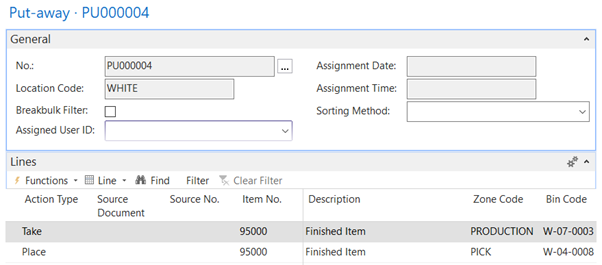
On registering the Put-Away, the Warehouse Internal Put-Away is automatically posted too.
Case closed and we can finalize the production order.
Next up, let’s complicate things a little:
- Production is in the same location as the warehouse
- There are only one set of bins for flushing
- All flushing is set to Backward including the capacities
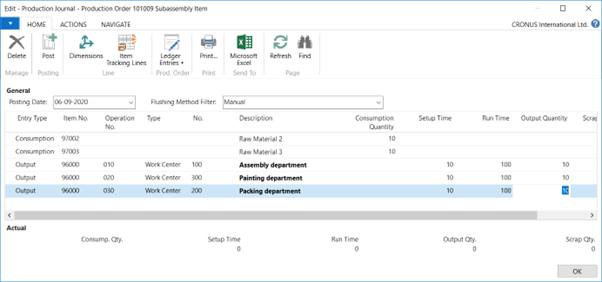
Looking at the production journal, it is clear that all consumption and output is directed to the Open Shop Floor Bin:
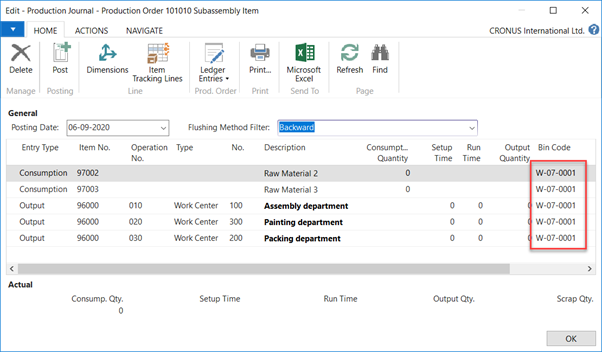
This means finalizing the production order, all consumption will be taken from the Open Shop Floor Bin and all output will be placed in the Open Shop Floor Bin.
In this case, the raw materials must be manually moved in a Movement Worksheet to the Open Shop Floor Bin before finalizing the production order.
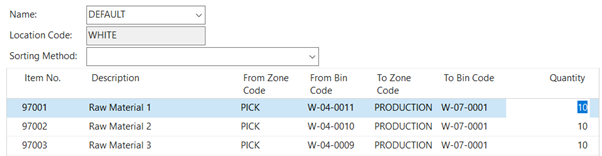
This will create a Warehouse Movement:
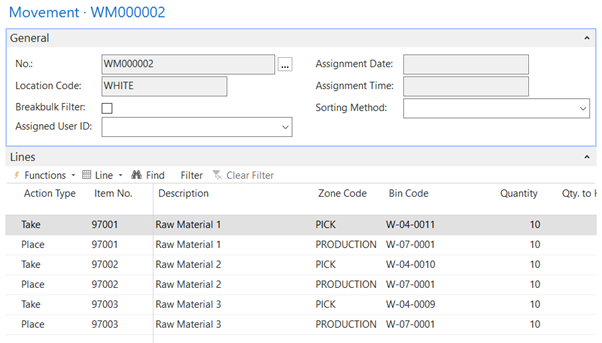
This is another task that can be automated on releasing the production order.
Now the production order is ready to be finalized:
The finished item must be moved manually to inventory as described previously.
Lastly, let’s check the Pick+Backward Flushing method:
- Production is in the same location as the warehouse
- There are only one set of bins for flushing
- All flushing for the components is set to Pick+Backward with a Routing Link to the first operation
- Capacities Flushing are set to manual

Notice that the To-Production Bin is used and that the sub-assembly is directed towards the Open Shop Floor Bin.
Clicking the Create pick will create the following Pick:

Registering the pick, will then enable the posting of the consumption when the output for the first operation is posted.
Now we could complicate things by adding multiple locations or adding separate sets of bins for each capacity, but that will have to wait.
I hope this clarifies the integration part.


