During my latest Power BI workshop at Directions EMEA in Madrid, a question came up:
How do I create a filter in my Power Bi to select different companies?
Well, this is also possible.
Here is the recipe:
I want to create three queries:
- Customers, based on an oData connection published from page 21.
- CustTrans, based on an oData connection published from page 25.
- SalesPeople, based on an oData connection published from page 14.
Normally I would make a query based on:
http:[Server]:[Port]/[Instance]/OData/Company(‘CRONUS%20International%20Ltd.’)/Customers
to make a query to a table, but if I want the company name to be selectable, I cannot do that.
Instead, I make a query based on:
http:[Server]:[Port]/[Instance]/OData
That way, I get the following choices:
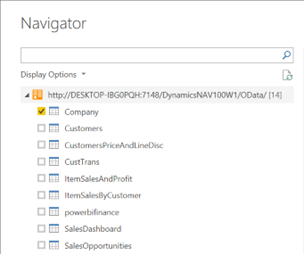
Clicking only Company, I get the next selection.
However, I could also have based the query on:
http:[Server]:[Port]/[Instance]/OData/Company
That would take me directly to the next screen
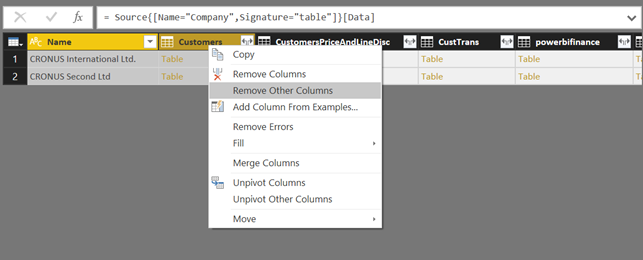
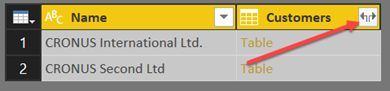
Now I select the Company Column and the Customer column and remove all other columns, leaving me with only two columns. In order to expand the Customer table, I click the two arrows:
Now I can select the fields to include in my dataset. The Company Name column will be added to the query with the name: Name. This will have to be renamed to Company_Name. I will do that later.
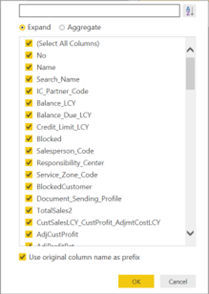
Now the needed fields can be selected for the query.
Then click OK.
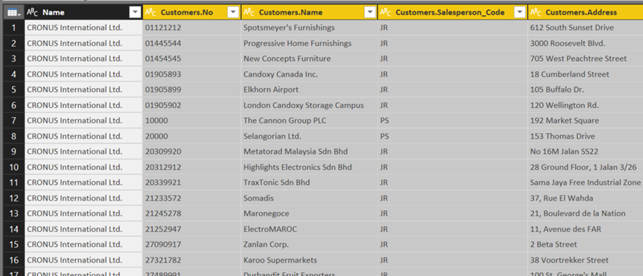
The result looks something like this:
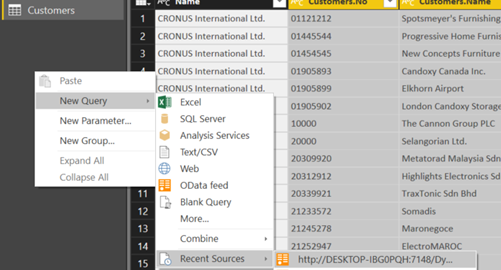
Rename Query1 to Customers. Then add the other two tables by right-clicking the grey area underneath the Customers query
Select the Company table again and repeat the process described above. Name the two tables CustTrans and SalesPeople. Include the following fields in each table:
CustTrans:
- Posting_Date
- Document_Type
- Document_No
- Customer_No
- Currency_Code
- Amount
- Amount_LCY
SalesPeople:
- Code
- Name
Next, it is necessary to go through all fields and make sure that the datatypes are correct. Strangely enough the datatypes of the fields are better than if I address the CustTrans query directly, but it still needs to be done. Now only the Date Time fields must be changed to Date.
Now it is necessary to rename all company names from Name to Company_Name in all queries.
Power BI cannot handle linking two queries together with multiple fields, therefore we need to make a small work-around.
We will create a new primary key for each table.
To make a new primary key consisting of both Company_Name and Customers.No and Company_Name and SalesPeople.Name, we need to create one or more extra fields in each query.
Therefore, click the Add Column tab, (If you don’t have an Add Column tab, then you are not in the Query Editor, and you need to click Edit Queries first) and click the Custom Column action and add the fields in each query:
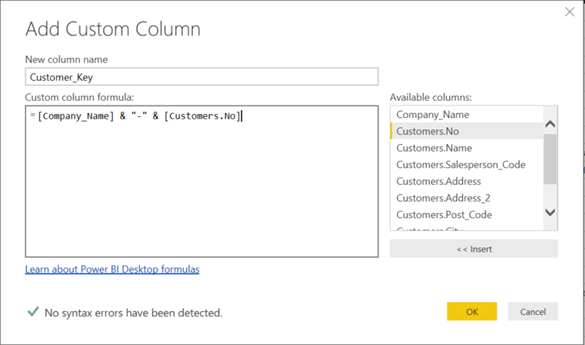
Customer:
- Customer_Key = [Company_Name] & “-” & [Customers.No]
- SalesPerson_Key = [Company_Name] & “-” & [Customers.SalesPerson_Code”]
CustTrans:
- Customer_Key = [Company_Name] & “-” & [Customers.Customer_No]
SalesPeople:
- SalesPerson_Key = [Company_Name] & “-” & [SalesPeople.Code]
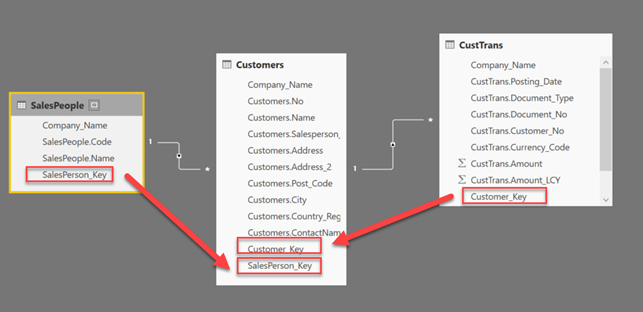
Now we can link the tables together.
Click the Home tab and then Close & Apply.
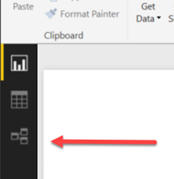
Then click the Relationships icon.
Now you will see that, because I named the fields the same, Power Bi automatically found the link between the queries. If you have named the fields differently, you will have to make the links manually.
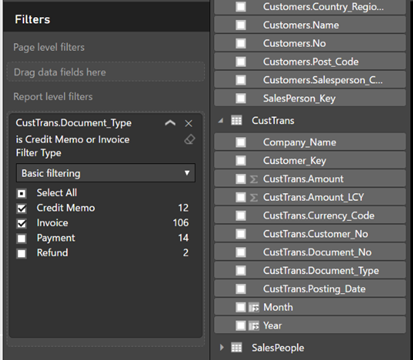
Then I need to make a filter on the CustTrans query to see only Invoices and Credit Memos:
Now it is possible to make a model:
So, I go to the report area and select a Matrix visualization:
Rows:
- Customers.Name
Columns:
- SalesPeople.Name
Value:
- Amount
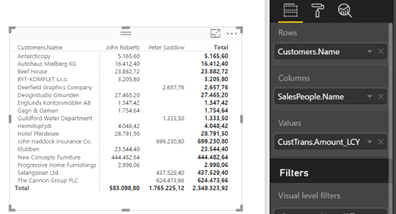
And a Slicer to select the Company_Names.
You can add other visualizations to add more filters and spice it up a little.
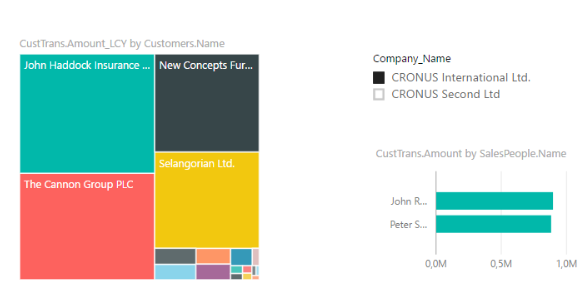
It could look like this:
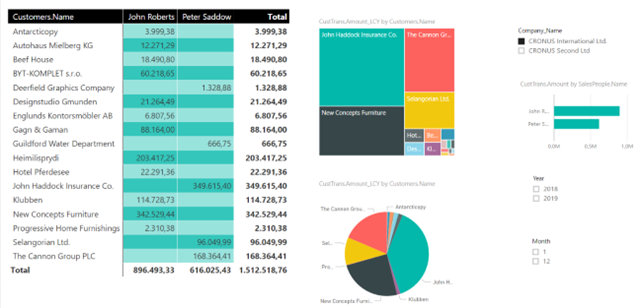
Note that the Amount and Amount_LCY fields are not the most suitable fields for the model since it can include VAT. The best would be to publish a new page as a copy of page 25 (Customer Ledger Entries) with the Sales (LCY) field and use that instead.