
When the Modern Client was released with Dynamics 365 Business Central Release Wave 2, Microsoft promised to have fixed a lot of the problems that previously held end-user customers from using the Web-Client:
- Missing shortcuts
- Missing Quick-Entry
- Missing Departments menu
- No Personalization
- Too many levels in the menus
- Copy/paste failed periodically
So, during my last Application course at @Readynes in Sweden, we decided that we would run half the course in the Dynamics 365 Business Central Spring Release’s Windows client and the other half in the Dynamics 365 Business Central Release Wave 2’s Modern client.
Why only half? Well, because if I only teach the delegates about the Modern client, they will not know how to operate the Windows client running with their customers Dynamics NAV 2009 up to Dynamics 365 BC SR. And trust me, I still have customers running both Navision 3.70 and 4.0
So, being the Kamikaze trainer that I am, we dove right into it. Also, we tried to keep the mouse out of reach, and to operate the client with the keyboard alone.
And without further ado, here are our experiences:
The Modern client looks more or less like the Spring Release web-client:
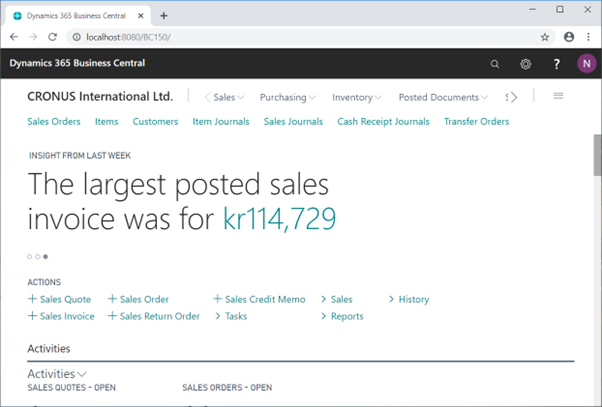
As in the previous versions F11 (full Screen) helps a lot:
Now I have more space for the actual relevant information on the page.
The first thing I notice, is the 3 lines in the top-right corner:

That is the new Business Features menu, something akin the Departments Menu, but only for the Role Center:
This can be accessed by Shift+F12, by the way.
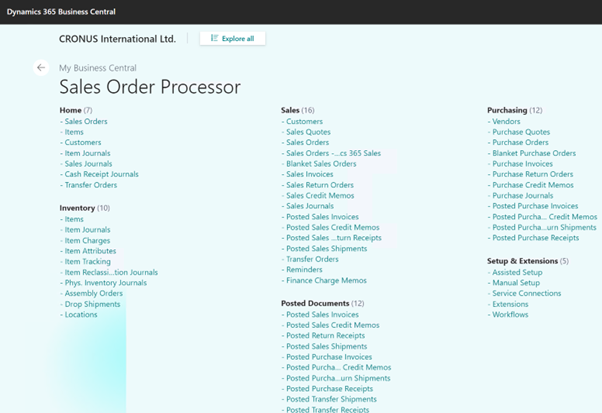
These are all the list pages shown on the profile to access directly, but it is also the access way to the new Departments Menu:
 (No Shortcut)
Here we get all the Lists, Tasks, Administration pages and Reports that we earlier got from the Windows client’s Departments menu:
Selecting one of the menu items will take me back to the Role Center where it executes the function. Esc, a couple of times will do the same if I don’t select anything. F12 (Go-to Role Center) has not been implemented since the web browser uses that for the development menu.
How about Ctrl+F12?
As appose to the previous versions, it is both possible to personalize, configure Role Centers and design pages. The difference between these are:
- Personalizing the page is changing the page only for me as a user
- Configuration of the profile is changing the pages for all users that has been assigned to the profile
- Designing pages will create an extension and it will affect all users despite profile
Personalizing the page
Click the Gear icon in the top-right corner of the client and select Personalize:

Now the Personalizing bar appear:

Click in the page part that you want to change:
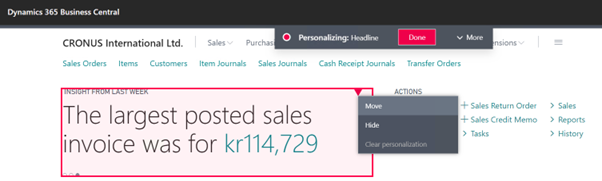
Hide it or move it to where you want it, in this case I hide it to create more space for my Cues.
Personalizing a card page or a list page is a little different:
Here it is the Customer list:
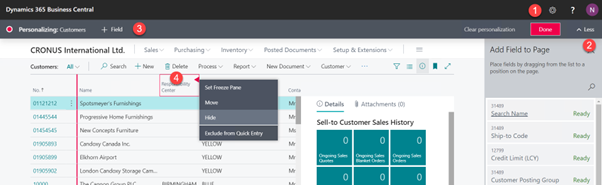
Click the Gear icon, select Personalize, click ^More to show the + Field action and either drag a field from the Add Field to Page section
to the desired place or point to the field that you want to either:
- Use as Freeze Pane
- Move somewhere else
- Hide from the page
- Exclude from Quick Entry
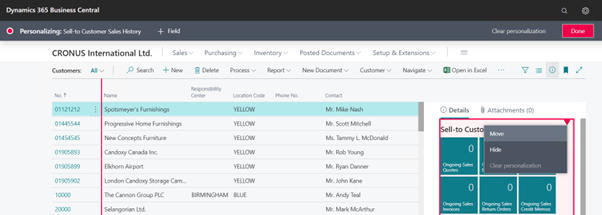
This also applies to the Fact-Boxes:
Adding actions to the page, the new Bookmark functionality has been introduced:
Use Alt+Q to search for the page you want to add, in this case the Released Production Orders:

Click the Bookmark icon and the action has been added to your Role Center:

It is just as easy to get rid of an action, click the action, in this case the Transfer Orders:

Then unselect the Bookmark and it is gone:

Clearing the Personalization
To clear the Personalization that has been applied to the page, click the Gear icon again, select the Personalization item and click Clear Personalization.

Select the level you want to clear, in this case All:
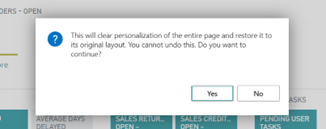
Confirm the action, and the profile is back to the configured profile.
Designing the page
Designing the pages works the same way, but now it will apply to all users and it will be saved as an extension:
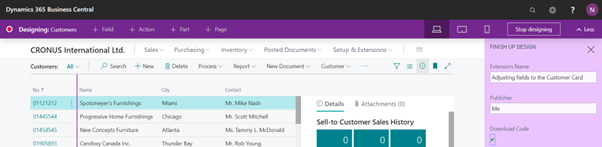
Looking at the code that was downloaded, it is apparent that the number series used for the extension is 50100 and forward, so watch out if you have other plans for that number series.
Configuring the profile
If you want to configure the profile, it is necessary to go to the profiles list. Alt+Q and search for profiles.
Press Alt+Shift+F3 to open the Filter Pane and to select the Primary Key.
Search for the Order Processor profile and press Shift+F3 to close the Filter Pane
Press Shift+F10 to open the line menu:
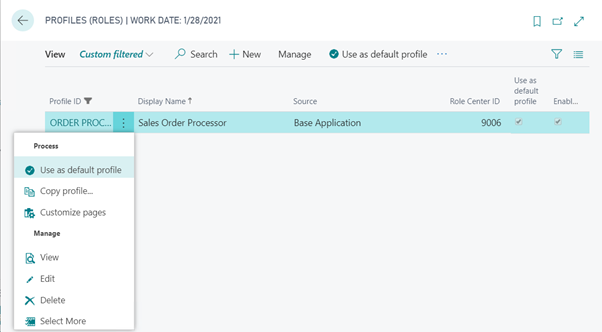
Now select the Customize pages item. This brings out the Profile in Configuration Mode.
Here you can hide or move menus, actions and page parts.
Example Removing the Sales Journal from the profile:

You cannot add new menu items to the page using the new bookmark functionality. This functionality is yet to be implemented.
Clicking the Done button, the following message appear:
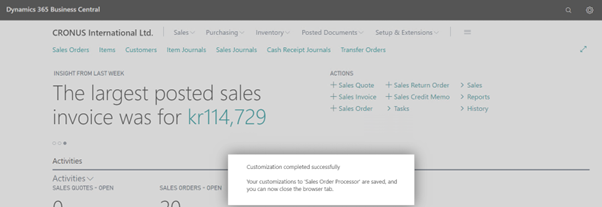
Ctrl+F4 will close the browser tab and bring you back to the Profiles list.
Restart the browser for the changes to take effect.
Clearing the Customization
To clear the customization on a page, it is necessary to go to the Profile card:
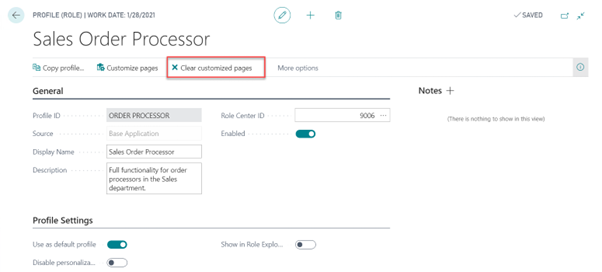
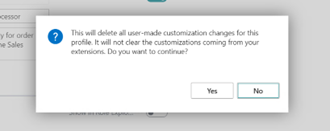
Here you can click the Clear customized pages action. This will give this warning:
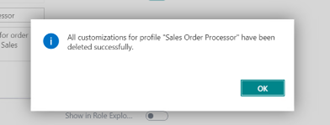
Confirm the change and the customization is gone.
Restart the browser for the change to take effect.
Taking the Modern client for a spin
Let’s take the Modern client for a spin application wise:
- Maneuvering the Role Center
- Open Inventory Setup and activate the Automatic Cost Posting and the Automatic Cost Adjustment
- Go to the Departments menu to find the Adjust Cost – Item Entries batch
- Go back to the Departments menu to find the Post Inventory to G/L report
- Create a new customer with a template from the sales order
- Create a new Item with a template from the sales order line
- Post a couple of expenses in the G/L Journal
Just to take some random examples.
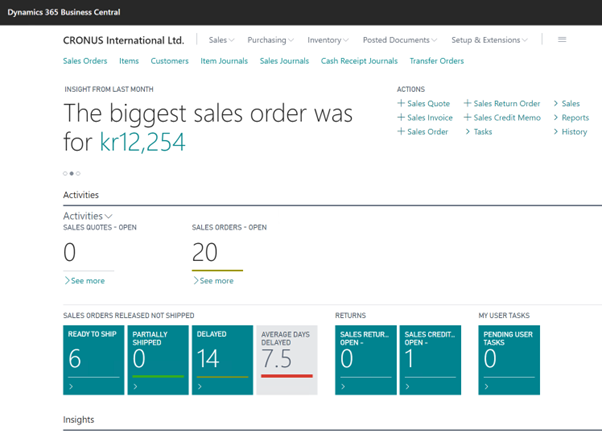
Maneuvering the Role Center
Opening the client, it takes a bit of getting used to maneuvering the Role Center. I prefer to start with the F11 to get a full Screen. I still haven’t figured out where the cursor is when I start the client, but if I use the Tab and the Shift+Tab and then the Arrow keys,
it switches between the different menus.
Space, Arrow Down or Enter will expand the menus:

If I accidently open a page, I can always go back with Esc.
It seems clear that the fastest way to access a page is to use the Alt+Q function and search for what you need.
It is also clear that the Next-next installation I made of the D365BC RW2 has ignored my Region and my time zone.
Opening My Settings shows this:
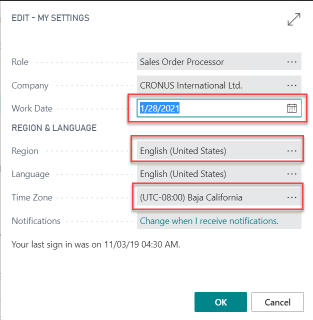
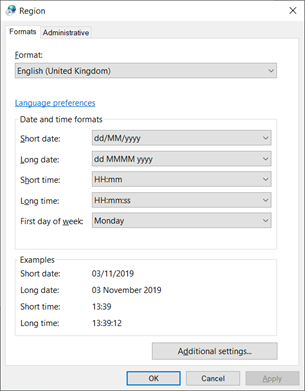
Region is set to English (United States) but my Regional settings actually states this on my server and client:
Also, I would like to be in Baja California but my Time Zone on the server has been set to:

The service tier makes it even more confusing:

So, make sure to adjust these before you start using the client.
Preparing for the flows
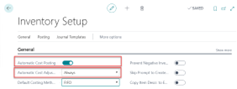
In order to run a few flows, I want to activate the Automatic Inventory Batch and the run it manually to get it up to speed. That can be done by:
- Set the Automatic Cost Posting in the Inventory Setup
- Set the Automatic Cost Adjustment in the Inventory Setup
- Run the Adjust Cost – Item Entries
- Run the Post Inventory to G/L
So, opening the Inventory Setup is Alt+Q and type Inv Set:
Then go back to the Role Center with Esc. Even though it says üSAVED in the top, we realized that e.g. changing a Customer on the Customer card, it actually said üSAVED in the top, but the customer was not actually saved until we left the page.
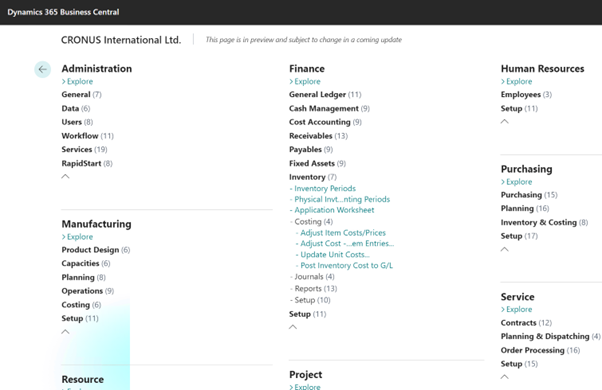
Then I press Shift+F12 to go to the Business Features menu.
Here it is actually possible with a little Shift+Tab and Arrow keys to press the Explore All action.
Now I can Tab my way through the modules until I land on the Finance module, then with the Arrow keys to select the Adjust Cost Item Entries batch.
It is way easier to use Alt+Q and type Adjust Cost and select the Adjust Cost Item Entries batch.
Same thing with the Post Inventory to G/L.
Next Run a Flow Creating a new Vendor and Item directly from the Purchase Order
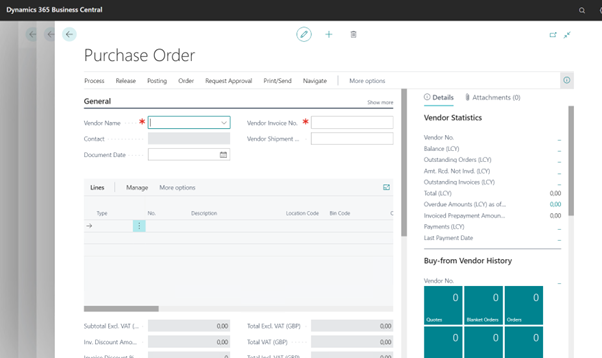
Use Alt+Q and search for Purchase orders.
It is not possible to create a new with Alt+N from the list, but if I press Space or Enter to open the first, then I can create a new with Alt+N.
Notice that I am already three pages in here:
Typing My New Vendor in the Name field, will give me this:
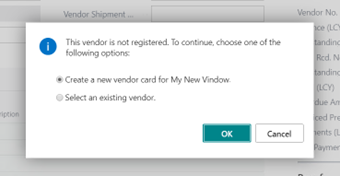
I then select the template:

Ctrl+Enter will Jump to the Ok button and Ctrl+Enter will select and close the selection.
Ok ok, so I made a typo creating the vendor. But now I cannot create a My New Vendor by using the same functionality with it automatically selecting the My New Window vendor. I have to delete the wrong one first.
Hmmmm.
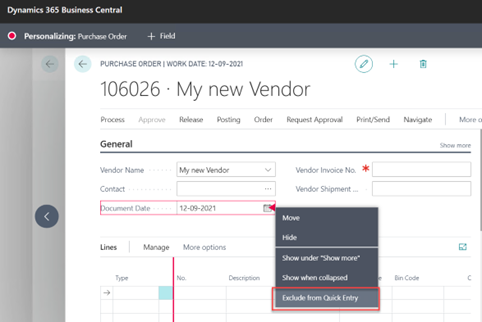
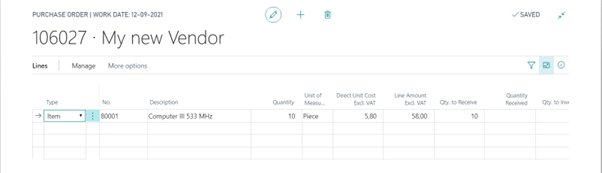
Correcting that, I now have a My New Vendor, and Ctrl+Enter will select the new vendor and return to the purchase order:

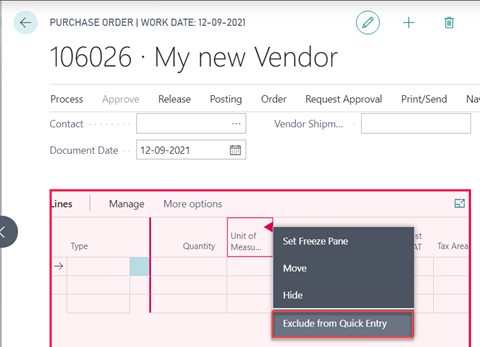
In the Purchase order, I can use the Personalization to select which fields should be included in Quick Entry, making it much faster to enter data, In this case I only want to keep Vendor Name, Contact and Vendor Shipment Date on the header:
And from the lines I only want to land in Type, No, Quantity and Direct Unit Cost. This way I can enter data quickly into the purchase lines:
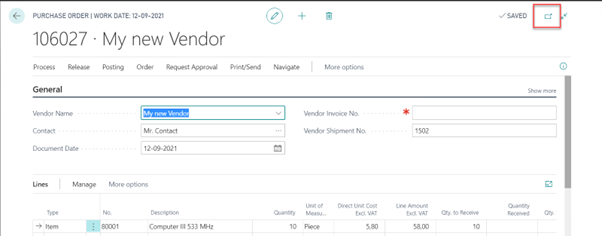
This means that I can enter a full Purchase Order by typing:
- Alt+N to create a new
- Type the vendor name and press Enter
- Type the contact (if needed) and press Enter
- Enter the Requested Shipment Date and press Enter
- Now I’m in the, Type field of the Lines, type I for Item and press Enter
- Type the Item number and press Enter

Ups, now it jumped to the next line instead of moving to the Quantity field. This must be fixed!
Going back to the Type field above and pressing Enter, it jumps to the No. field and next to the Quantity, but always after entering the No. it skips to the next line.
A super cool feature is that it is possible to expand the page to show more or less on the page: normally it will show this:
But if I click the Open in a New Window icon, I get the purchase order in a separate window:

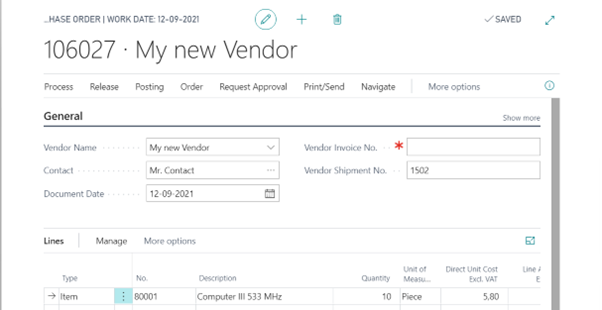
But If I click the two arrows in the corner instead:

It shows this:
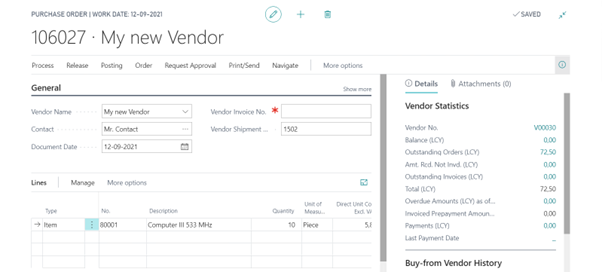
If I instead had clicked the (i):

I can toggle the FactBox area on and off.
And lastly, if I had clicked the Focus icon:

Then I get a window with only the lines:
This is super cool.
If I want to create new items directly from the lines, it must be set up first. So on to the Purchase & Payable Setup page with Alt+Q.
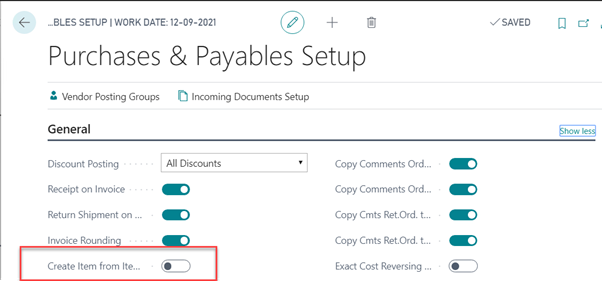
Turn it on and return to the purchase order.
Type an unknown Item Description in the No. field and the following message appears:
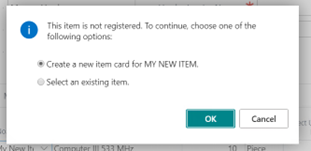
Create the new Item using a template:
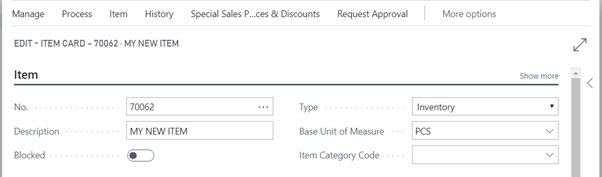
Press Ctrl+Enter twice to return to the purchase order line.
See the statistics using F7.
Post the Purchase Order using F9 or Shift+F9.
Post a couple of expenses in the G/L Journal
After this relatively successful creation of purchase orders with new vendor and new item, what about the General Journal?
Previously there have been massive criticism due to lack of user-friendliness in the journals. Let’s check if that has been resolved too.
Opening the General Journal by pressing Alt+Q and searching.
The first thing I notice, is the lack of fields:
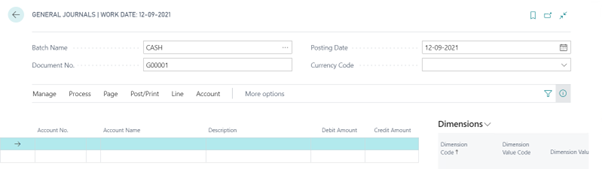
The Document Type, the Account Type and many other fields are simply missing.
Personalization does not help either.
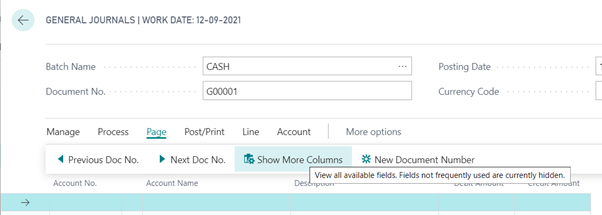
It is not until I find an action in the Page menu called: Show More Columns, I get the full amount of fields in the General Journal.
I’m sorry, this has no place in a journal, used daily by thousands of accountants and bookkeepers. It looks like something made for people entering expenses on the road via the Phone or the Tablet App. Fine, they should also have some new functionality, but it should be as a function you turn on, not something that will annoy the ¤#%”¤ out of the primary users that are using the general journals every day.
Luckily the General Journal is the only place where it has been implemented.
Clicking the Show More Columns will bring the page back to normal.
Now the big job begins. Trimming the journal:
I remove the fields not needed in my company:
- Account Name (it is already in the footer of the page)
- EU 3-Party trade
- Correction
- Comment
- And the dimensions not used by me
Then I add new fields needed by me:
- VAT Prod. Posting Group
- Bal. VAT Prod. Posting Group
Then I exclude all fields from Quick Entry except:
- Posting Date
- Document Type
- Account Type
- Account No
- Description
- Amount
- Bal. Account Type (can be omitted if a default has been setup on the batch)
- Bal. Account No. (can be omitted if a default has been setup on the batch)
This way I can create lines with only touching eight fields. After Bal. Account No. it jumps to the next line.
Here we can use all the good old shortcuts:
- Alt+Arrow Down : Lookup
- Shift+F11: Align + Set Align Id
- Ctrl+F7: Ledger Entries
- F9: Post
- Shift+F9: Post+Print
With RW2 we don’t even need to wait for the server response any longer. Now it is just typing and pressing enter just like in the good old days.
This is perfect.
Conclusion
We are getting there. There are still small glitches, but in the whole, this is what the users have been asking for.
There can always be more shortcuts and adjustments:
- Jump to the Role Center
- Alt+N from the list pages
- Access the Departments menu
- Make the Quick entry work on the Document line pages
- You still cannot edit the Field-Mapping in the Data Exchange Definition
- The Intrastat Journal still does not show the errors on the page
- And so on…
But the majority of the functionality is there, and I must admit, that after only two days, I realized that I can roll with this on a daily basis.
So, when CU1 version shows up, I’m going to upgrade to that.
Just one word of caution, like the old classic client, it is possible to accumulate a lot of open pages, and sometimes it is necessary to close them all by clicking Esc a lot of times.


